Enhanced TDS
Identification & Functionality
- Accessories & Parts
- Technologies
- Product Families
Features & Benefits
- Equipment Features
- Features and Benefits
Heavy Weight Clips
Provide excellent support of mirror with thickness up to 1’4”.
• Slotted screw holes : Provides ease of installation
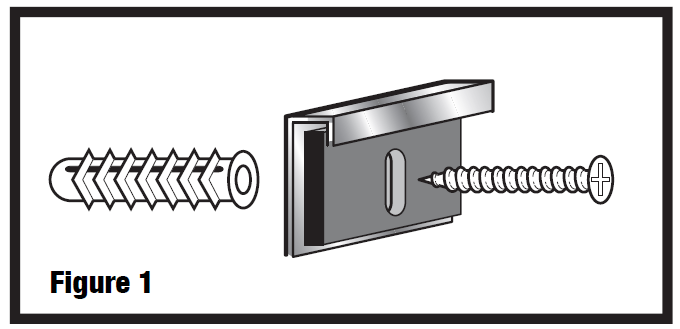
• Padding : Provides protection to back of mirror from being scratched by installation screw heads. Also provides snug fit of mirror into front leg of clip.
• Bright metallic finish
• Set of 4 padded clips with screws and anchors
• Packaging designed for showroom rack display
• Easy to read installation instructions
Applications & Uses
- Markets
- Applications
- Installation Instructions
1. Hollow wall anchors are provided and should be used when installation of screws can not be made directly into wall studs. A 3/16” drill bit should be used. (Figure 1).
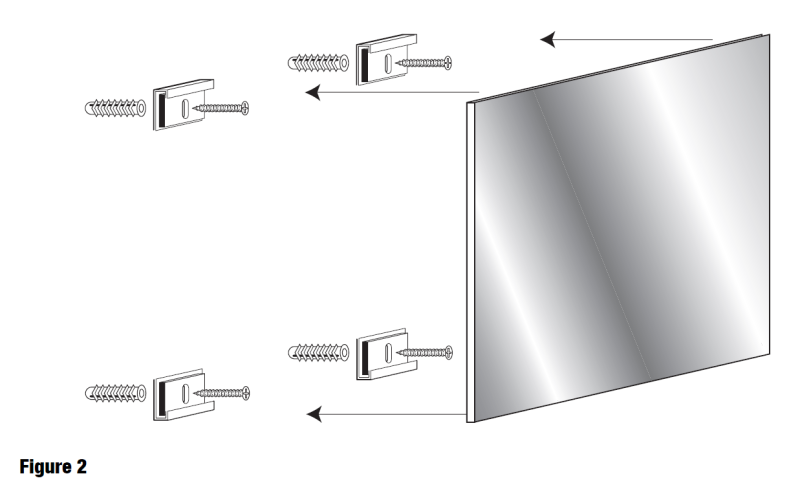
2. Mount bottom clips to wall with screws positioned at the top of the slot.
3. Measure from the bottom of clip, up the wall to the exact height of the mirror. Mark mirror height with a line. (Figure 2).
4. Mount top clips at the bottom of the slot, 3/8” above the marked line. Tighten screws in place at bottom of slot.
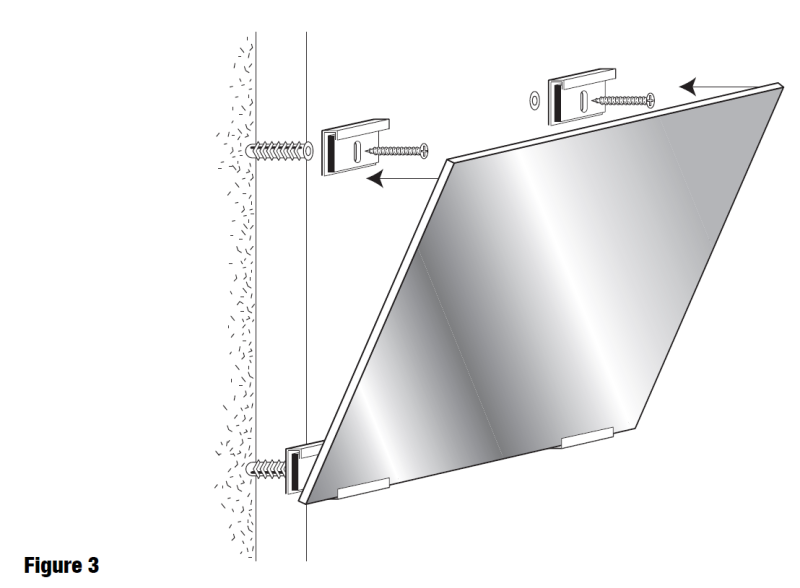
5. Set mirror carefully into bottom clips, then slide top clips down over the top of the mirror. (Figure 3).
NOTE: For additional strength and safety, use Gunther Mirror Mastic between mirror and wall.


Packaging & Availability
- Regional Availability
